Step 3
The journey continues… After buying an external hard drive, the next thing to do is to hook that up to a laptop or PC.
Do you have an old or second hand computer laying around? The good news is that old PCs sound every bit as good – when it comes to serving digital music – as that shiny new powerhouse you see in Harvey Norman.
Musical bits don’t discern processor types. So go cheap – buy a second hand el cheapo PC.
Hooking up a new external drive to the PC should be glitch-free – whether via USB or Firewire. I recommend getting a Firewire drive if your older PC (or Mac) has a firewire connector. Why let a good USB port go to waste?
One of the most fun things to do is to pick the right digital music player software to rip and play your music.
I tried iTunes, Windows Media Player and dabbled with a raft of open source media players like Songbird, Foobar and VLC. I ended up choosing Apple’s iTunes player, since there isn’t a better open source player out there now that are as feature-packed, and are as good at handling song ID tags as Apple’s free player. I also liked how iTunes handle cover art, an aspect which for some is as important as the listening to the music itself when it comes to enjoying the music.
Especially if your library is a quirky one laden with cover art gems.


The main downside of iTunes is speed: Navigation seems to have been slowed by my 10,000 track library and will no doubt crawl slower as more songs are added.
The next essential is a remote control that lets you change tracks from across the room.
Now, flipping over LP records is a ritual that I’ll never tire off – there’s something mechanically cool about returning the tone-arm back to its arm rest, flicking the record 180 degrees with your thumbs while pivoting the record edges on your two palms, lowering it back onto the spinning platter, gently brushing it clean with a carbon-fibre record brush, and then gently lowering the stylus to meet that first LP groove, with that pfffft sound crackling from the loudspeakers as you do so – right?
But getting up from across the room to change digital music tracks via a fiddly mouse is tiresome.
Quite a few companies make remote controls that let you change music tracks in your PC. For the iTunes, Keyspan has one that looks cool, but shops in Singapore don’t seem to stock it. This is how the Keyspan TuneView looks like:

One cheap and cool-looking device, which works with both iTunes and Vista, which has a name that escapes me at the moment, is sold in South Asia Computer in Funan Mall. But that one only works with a laptop with the mini PC Card slot found only in newer laptops – urgh!
Step 4
Next step is getting the musical bits outta your PC, and into your hi fi system. Stay away from the anolgue output of your PC’s (typically cheap) soundcard. This means don’t use the headphone or line-out jacks in your desktop or laptop PC. Get a dedicated DAC (digital to analogue converter) instead.
This is what I use:

My second-hand esoteric Japanese ceramic-housed DAC, called Shigaraki DAC, is one of the best DACs I’ve ever heard – although I have had to save up for this rather expensive toy.
I also have this cheaper DAC – made by a Hong Kong firm called Trends Audio – that sounds pretty good for the $250+ I paid:

To hook up your PC to your DAC, you’ll likely need a USB to digital converter, since most DACs don’t accept USB input directly. The above Trends Audio unit can serve as a converter. In this mode, it bypasses its internal DAC.
Another USB-to-digital converter which has been raved a lot in audio circles is one made by a US company called Hagerman Technology. But the HagUSB is only available online:
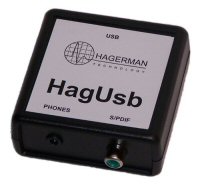
This device acts a go-between between your PC and the DAC. Your PC should readily recognise it as a USB audio device. So all that’s left to do is to select this as your primary playback device in your PC. Do this under control panel > sound and audio device.
Step 5
Getting it all to work… will be discussed next week! Thanks for staying with me so far…


After trying a 750GB Western Digital MyBook Home Edition, which is still a lot quieter than my half-terabyte Buffalo, I have to conclude that the 750GB Seagate FreeAgent Pro is still the most quiet of the lot. But these Hardware Zone (US) tests, http://www.hardwarezone.com/articles/view.php?id=2431&cid=10&pg=4
http://www.hardwarezone.com/articles/view.php?id=2444&cid=10&pg=3
indicate that the FreeAgent Pro lags on Fire 400 performance, which is very important to me.
If you’re a Windows user, MediaMonkey (mediamonkey.com) beats the pants off the ineffecient Windows version of iTunes. Nothing comes close. For Linux and Mac-heads thinking of running it in Wine on their systems, don’t bother – the latest version of Crossover Office, 7.1, installs and boots MediaMonkey just fine, but little glitches after that make in unuseable in the long run.
Front Row is, sad to say, inadequate because it doesn’t have half the features of iTunes, like a decent search function, and doesn’t utilise any of iTunes’ plugins, so if you’re an SRS iWOW user, you won’t be able to use all those phase adjustment customisations you’ve made. For decent Mac media center software, check out Plex (www.osxbmc.com), which is a Mac-specific port of multi-platform XBMC (xbmc.org).
For an offboard DAC, I’d recommend Firewire over USB 2.0 because the latter generally has higher CPU overhead compared to the former. Firewire’s basically better at handling sustained data transfers, which is what audio involves. And I recommend the M-Audio Firewire Solo I’m currently using.
Uncle, glad you are not of the snobbish audiophile crowd still snooting at “digital music”. You tried Slim Devices?
There’s the relatively cheap Squeezebox (think $500) – sold at Funan (not Adelphi obviously). Then there’s the Transporter, the “audiophile’s DAC” for digital music, which costs I think in the thousands. There’s a local disti I remember when I was researching on this. Google it.
EDIT: Try this too… comes with a remote!
But until I get all my songs on lossless WAV or FLAC, I am only streaming them over Ethernet to my lousy XBox. Sounds yucky, but then most of the source is yucky to begin with. For now, CDs are still great – until DRM-free, lossless music becomes easily available (right now, it’s patiently ripping every CD into WAV or FLAC).
In any case, I think this may spell the end of some of the “mystique” of hi-fi… when people will argue that a 1 and a 0 on one CD sounds better than another because of the chemicals used on the disc, or when some say some exotic “oxygen-free” cables are really better than regular lousy-ass cables… aaron, over to you, stereophile!
If you’ve decided on iTunes (against the spirit of PC heads), why not the Mac mini? The Front Row application that comes with OS X would be useful to operate the “media PC” via your TV or an old LCD monitor.
Regarding DACs, you might want to consider audiophile-grade DAC/amps such as RSA Predator, Headstage Lyrix or a Headroom Desktop Amp