
So you’ve just bought your laptop and want to swap out the hard disk for a speedy solid state drive (SSD) instead? This is usually a straightforward task thanks to the modular designs these days, like on the Apple MacBook Pro and fortunately, the HP Envy 14 I had just bought recently.
But some things still need to be taken care of to ensure everything runs smooth with your speedy new drive. Here’s a guide to install an SSD into your new HP Envy 14.
(Disclaimer: Techgoondu is not responsible for any damage or loss of warranty to your laptop!)
1. Set up your recovery discs
Before you do anything, make sure you create the recovery discs that contain all the software your PC comes with. Without these, you’d have to get a separate copy from HP, which won’t be free.
Go to Start/Programs/HP Recovery Manager/HP Recovery Media Creation and fire up the process. It takes an hour – maybe more – to copy all the stuff onto three dual-layer DVD discs or four CDs, but HP offers the option of copying onto a USB drive, which is much faster.
Only thing you have to note is that USB drives do break down more easily and files can be accidentally deleted. And for HP, you only get to create one set of recovery discs. So, make sure you store your recovery software securely.
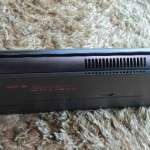
2. Take out the battery housing
Before you remove anything from the laptop, power it off and unplug the power cord. Flip over the Envy 14 and locate the notch that secures the battery housing. Push it and lift the housing.


3. Remove the battery
You’ll now see the battery and hard disk. Find the two orange tabs on the battery – these are the catches that hold it in place. Take out the battery first.


4. Remove the hard disk
There are several screws that hold the hard disk and its housing in place. Remove them and pull up the housing. You’ll find that the housing holds in the hard disk pretty snugly, so try to push it out slowly. Avoid tearing the black plastic, which can be easily damaged if you’re impatient. In my case, I found a nice, speedy Western Digital Scorpio Black in there.


5. Check out the SSD
My replacement SSD was an OCZ Vertex 2 I had in my previous laptop. This was pretty fast, so I decided to migrate the rather humble 120GB capacity into the new laptop and use the original WD hard disk in an external case. Most of my data is stored in a networked attached storage (NAS) machine anyway, so I don’t need so much capacity on the Envy 14. Besides OCZ, other SSD makers such as Corsair, Kingston and Crucial are also worth considering – just make sure you get one that slots into a 2.5-inch slot for simple installation.

6. Install the SSD
In the same way that you take out the hard disk, slowly slide back the SSD into the hard disk housing. Then place it back into the laptop and screw it back in. Replace the battery, lock it (using the orange catch) and finish the physical installation by slotting back the battery housing.


7. Install the software
The next thing to do is to get your recovery discs you created earlier and install the software. When you power on the laptop, quickly press ESC to display options to re-install the software on your laptop. Just follow the instructions for recovery on screen and place each disc into the drive when you are prompted to.
Unless you are using a USB drive, this is a rather lengthy process that can take hours. I’d go get a beer and come back once in a while to check on things. When everything’s installed, and you get into Windows for the first time, make sure you run the Windows performance test immediately. You can access this by going to Control Panel and clicking on Performance Information and Tools.
Windows 7 plays well with SSDs in that it won’t defragment the disk and cause it to slow down. Running this Windows performance test lets the operating system know that you’re running an SSD, so it would not try to defrag it.
The only thing left to do then is to enjoy your SSD! You’ll notice that battery life is much improved. Of course, it’s faster to boot up (about 22 sec for me) and to fire up programs as well.


Nice way of presenting it…..good job.
i have a question about my hp envy 14,make me headache .its catalyst control center for AMD.
so how can you check card 6630m is working on this notebook ? i change all to high performance and go to DXDIAG ,window show only i5 graphic(mean use card on board not the external AMD radeon). event i play game crysis or do something need high graphics.
IF you know how to config this switchable graphic,please teach me or email at ekinchen1@gmail.com
thanks very much
i do exactly like you but lated then you,so SSD drop price now,i get 240gb vertex 2 only 314 usd from newegg.its working perfect,alot faster than HDD 7200 rpm.thanks for teach me teardown my envy 14 and installation .
one thing i have to notice is dont defragment my laptop using SSD rite ? it will slow down and less- life the SSD