By using this site, you agree to the Privacy Policy and Terms of Use.
Accept
TechgoonduTechgoonduTechgoondu
  • Audio-visual
  • Enterprise
    • Software
    • Cybersecurity
  • Gaming
  • Imaging
  • Internet
  • Media
  • Mobile
    • Cellphones
    • Tablets
  • PC
  • Telecom
Search
© 2023 Goondu Media Pte Ltd. All Rights Reserved.
Reading: Get your Android Gingerbread update manually
Share
Font ResizerAa
TechgoonduTechgoondu
Font ResizerAa
  • Audio-visual
  • Enterprise
  • Gaming
  • Imaging
  • Internet
  • Media
  • Mobile
  • PC
  • Telecom
Search
  • Audio-visual
  • Enterprise
    • Software
    • Cybersecurity
  • Gaming
  • Imaging
  • Internet
  • Media
  • Mobile
    • Cellphones
    • Tablets
  • PC
  • Telecom
Follow US
© 2023 Goondu Media Pte Ltd. All Rights Reserved.
Techgoondu > Blog > Mobile > Cellphones > Get your Android Gingerbread update manually
CellphonesMobile

Get your Android Gingerbread update manually

Alfred Siew
Last updated: June 13, 2014 at 5:06 PM
Alfred Siew
Published: February 25, 2011
3 Min Read
SHARE

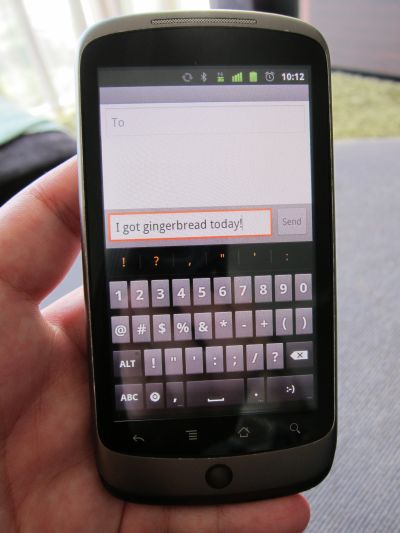
Enterprising Android fans have found a link to Google’s latest smartphone OS update and posted it online, so now Nexus One and Nexus S users don’t have to wait for weeks for that over-the-air download for the official Gingerbread update.

The nice chaps at XDA Developers have posted a link to the file here.

Alternatively, you can download directly here

-for Nexus One

-for Nexus S

How do you update your phone manually? Simply download the right update for your phone (one is for Nexus One and the other for Nexus S) and follow the same instructions you’d use for previous Android updates here.

A standard disclaimer, of course: it’s not our fault if you destroy your phone! But it’s safe to say, this update has been tried and tested here by this Goondu to work fine on his Nexus One.

UPDATE: Here are the instructions again (thanks to Gin Lee):

Step One:
Download to your PC the update file

-for Nexus One

-for Nexus S

Two
Rename the file update.zip.

Three
Connect a USB cable between your phone and PC

Four
Copy update.zip into the main directory of the SD card

Five
Shut down the phone

Six
Press Trackball and Power button together

Seven
When it restarts, you will see a DOS-like screen. Use the volume keys to move up and down and power key to select. Choose Bootloader then choose Recovery.

Eight
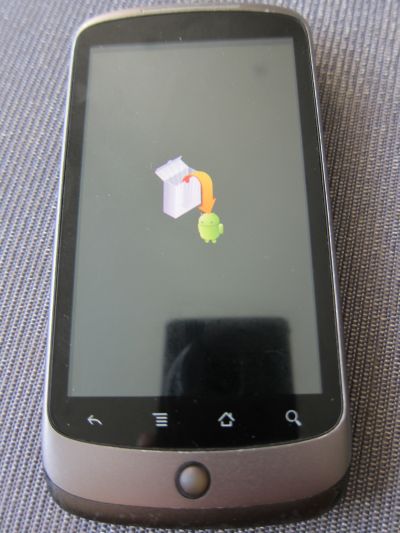
The phone then reboots until you see the picture of an Android robot with an ! sign. Now press power button and volume up button at the same time. Now use your trackball to scroll down to Apply sdcard:update.zip and select by pressing trackball. Your phone will now restart and some stuff will happen. Just wait and wait until you see your normal screen again.

(NOTE: I had a problem here where I was stuck with the Android robot with the ! sign and nothing happened. I took out the battery, restarted the process and was presented with the update menu and things went smoothly afterwards.)

Let us know in the comments section if you have problems or experiences to share on your own update. Alternatively, you can still wait for Google’s over-the-air update, of course!

https://www.techgoondu.com/2010/05/23/do-it-yourself-update-your-nexus-one-to-ver-2-2-aka-froyo/
Goondu review: Sony Xperia Z3+ hasn’t changed much
Goondu review: Samsung Galaxy Note 8.0
Apple iOS 16.3 users can use security keys like YubiKey to protect accounts
Another mobile wallet in Singapore with Samsung Pay out on June 16
Microsoft Surface Pro 8 review: A premium laptop and tablet rolled into one
TAGGED:GingerbreadGoogle Nexus OneNexus S

Sign up for the TG newsletter

Never miss anything again. Get the latest news and analysis in your inbox.

By signing up, you agree to our Terms of Use and acknowledge the data practices in our Privacy Policy. You may unsubscribe at any time.
Share This Article
Facebook Whatsapp Whatsapp LinkedIn Copy Link Print
Avatar photo
ByAlfred Siew
Follow:
Alfred is a writer, speaker and media instructor who has covered the telecom, media and technology scene for more than 20 years. Previously the technology correspondent for The Straits Times, he now edits the Techgoondu.com blog and runs his own technology and media consultancy.
Previous Article New iPad to be unveiled on March 2?
Next Article Google Docs inside Microsoft Office (or how Google slipped in an assassin into MS backyard)
5 Comments
  • Neelmish says:
    February 27, 2011 at 10:35 pm

    Thanks. I followed the steps mentioned and it worked fine.

    Reply
  • ginlee says:
    February 26, 2011 at 12:53 am

    works perfectly i followed the same old steps above

    Reply
  • Isman Tanuri says:
    February 25, 2011 at 6:17 pm

    I had the same problem too at the “Android robot with the ! sign” screen. I just pressed the Power button and the sdcard:update.zip menu screen appears. Loaded normally after that.0

    Whatever it is, do not panic! 🙂

    Reply
  • Frustrated upgrader says:
    February 25, 2011 at 11:40 am

    The steps on this page doesn’t seem to work:
    https://www.techgoondu.com/2010/05/23/do-it-yourself-update-your-nexus-one-to-ver-2-2-aka-froyo/

    I got stuck at the exclamation mark screen and a hanged phone that needs battery removal to recover. However if I modified step 6 with “volume up + power”, the upgrade will work.

    Reply

Leave a ReplyCancel reply

This site uses Akismet to reduce spam. Learn how your comment data is processed.

Stay Connected

FacebookLike
XFollow

Latest News

Computex 2025: Synology shows off C2 Surveillance cloud-based video monitoring
Cybersecurity Enterprise
May 23, 2025
A*Star, GlobalFoundries partnership pushes envelop on advanced packaging
Enterprise
May 22, 2025
Clair Obscur: Expedition 33 review: Rage against aging
Gaming
May 22, 2025
Computex 2025: A glimpse of the machines inside Nvidia’s “AI factories”
Enterprise
May 22, 2025

Techgoondu.com is published by Goondu Media Pte Ltd, a company registered and based in Singapore.

.

Started in June 2008 by technology journalists and ex-journalists in Singapore who share a common love for all things geeky and digital, the site now includes segments on personal computing, enterprise IT and Internet culture.

banner banner
Everyday DIY
PC needs fixing? Get your hands on with the latest tech tips
READ ON
banner banner
Leaders Q&A
What tomorrow looks like to those at the leading edge today
FIND OUT
banner banner
Advertise with us
Discover unique access and impact with TG custom content
SHOW ME


POWERED BY READYSPACE
The Techgoondu website is powered by and managed by Readyspace Web Hosting.

TechgoonduTechgoondu
© 2024 Goondu Media Pte Ltd. All Rights Reserved | Privacy | Terms of Use | Advertise | About Us | Contact
Join Us!
Never miss anything again. Get the latest news and analysis in your inbox.

Zero spam, Unsubscribe at any time.
 

Loading Comments...
 

    Welcome Back!

    Sign in to your account

    Username or Email Address
    Password

    Lost your password?